I’ve seen several messages on support forums lately about people having problems trying to install SharePoint 2010 RTM on top of Windows 7 x64 to create a development environment. The problems seem to stem from changes that have been made to the custom installation sequence required since documentation was written for the BETA. The Win7 Beta install instructions don’t work quite right for the RTM version. Microsoft updated the instructions on Technet today (April 30th), but I think they can still be somewhat intimidating since the cover Win7, Vista, and VM installations. So I thought I would boil them down to just a simple Win7 install and include pictures. Here are the instructions I’ve tested. Hope they help you.
Before you Install SharePoint
1. Install Windows 7 x64. Please Note: You can’t use either the K or KN edition (Korean)
2. Install the WCF Hotfix for Microsoft Windows (KB976462). The hotfix is available here: http://go.microsoft.com/fwlink/?LinkID=166231
3. Install the ADO.NET Data Services Update for .NET Framework 3.5 SP1 to enable REST (KB976127). It’s available here: http://www.microsoft.com/downloads/details.aspx?familyid=79d7f6f8-d6e9-4b8c-8640-17f89452148e&displaylang=en
4. Xcopy the SharePoint installation files from the DVD to a folder on your harddrive. If you downloaded them as an executable extract the files using the following command for SPF:
{path to EXE}\SharePoint.exe /extract:{subdirectory}
{path to EXE}\SharePoint.exe /extract:{subdirectory}
or this for SPS:
{path to EXE}\OfficeServer.exe /extract:{subdirectory}
5. Edit the installation configuration file called config.xml located in the \files\Setup\ folder under the subdirectory where you copied or extracted the setup files. Add the following line to the <Configuration> section:
<Setting Id="AllowWindowsClientInstall" Value="True" />
Note: These settings are Case Sensitive. Be very careful with your edits.
6. Install the following included prerequisite:
Microsoft FilterPack Beta – Found in the PrerequisiteInstallerFiles\FilterPack directory where you copied or extracted your files. Run FilterPack.msi
7. Download and install the following prerequisites:
- Microsoft Sync Framework from: http://go.microsoft.com/fwlink/?LinkID=141237
- SQL server native client from: http://go.microsoft.com/fwlink/?LinkId=123718
- Windows Identity Foundation from: http://www.microsoft.com/downloads/details.aspx?FamilyID=eb9c345f-e830-40b8-a5fe-ae7a864c4d76&displaylang=en
- Chart Controls from here (SPS only): http://go.microsoft.com/fwlink/?LinkID=122517
- SQL Analysis Services from here (SPS only): http://download.microsoft.com/download/A/D/0/AD021EF1-9CBC-4D11-AB51-6A65019D4706/SQLSERVER2008_ASADOMD10.msi
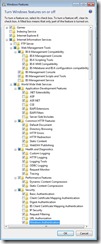
8. Go to Control Panel > Programs and Features > Turn Windows features on or off and enable the following Windows 7 Features:
9. Restart Windows 7 to activate the new feature set.
Install SharePoint Foundation or SharePoint Server
10. To install SharePoint Server 2010 or SharePoint Foundation 2010, run Setup.exe from the folder where you extracted the files.
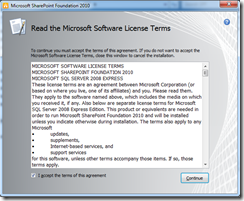
11. Accept the Microsoft Software License Terms.
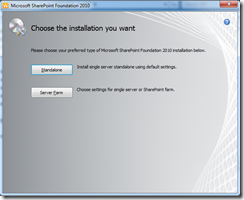
12. Choose an installation type. Standalone is the easiest and sufficient for many Developers. You will need a SQL server available if you choose to do a Server Farm install.
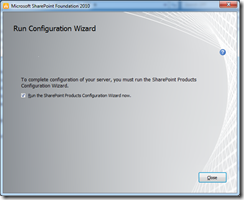
13. Once the installation is complete, you are prompted to run the SharePoint Products and Technologies Configuration Wizard. Click the Close button to complete the installation and configure SharePoint.
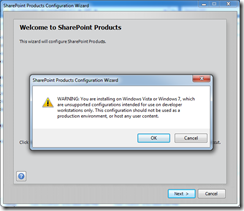
14. After a minute or two the SharePoint Products and Technologies Configuration Wizard will start. Click Next.
15. You will see a dialog box warning you that Windows 7 is not supported for production environments. Click OK
16. Next you will see a dialog box warning you that some Services will be stopped. Click Yes.
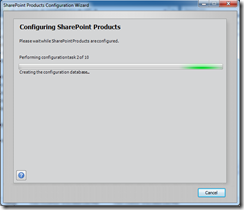
17. You will see a dialog box with a progress bar. Wait for the installation to be complete.
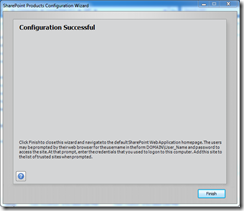
18. You should see a Configuration Successful dialog when the install is completed. Click Finish and SharePoint will launch the Central Admin website. You can now create additional SharePoint sites as needed and install your development tools.
You can now create additional SharePoint sites as needed and install your development tools.
You can see the full instructions on Technet here:

