SharePoint Saturday: Denver – Nov. 11-12

spsDen_logo_smallNext week I’ll be headed for Denver to speak at the Denver SharePoint Saturday event.  I will be presenting two sessions.  One will be an overview for users, admins, and developers who are just getting started on SharePoint online in Office 365.  The other is a more in depth talk for developers and admins on managing the various places that SharePoint stores user information.  I’ve reprinted the abstracts for my talks below:

Intro to Developing for SharePoint Online: What Tools Can I Use? – The introduction of Office 365 drastically changed the SharePoint development landscape. As a managed online service the rules for developing customizations for SharePoint Office 365 are radically different from the ones for an “on-premise” installation. They are also slightly different than developing sandbox solutions. In addition many companies who currently use dedicated SharePoint installations are beginning to consider eventual migration to the Office 365 cloud environment. That means even current “on-premise” development is often constrained in new ways. No matter what kind of development you currently do you need to know how to develop for Office 365. In this workshop/session we’ll cover the following topics:

  • Setting up an Office 365 development environment
  • Developing sandbox solutions for SharePoint Online
  • Building reusable workflows in SharePoint Designer 2010
  • Why the Client Object Model is even more important in Office 365

Users, Profiles, and MySites: Managing a Changing SharePoint User population – Every company has some level of employee change and turnover. The question is how do you manage the graceful removal or modification of user information from SharePoint? If everything is perfectly aligned SharePoint will automatically process and delete the user account, permissions, profile, and MySite for users that are deleted from Active Directory. Updates to user information are also automatic in many cases. But most SharePoint installations don’t have all the necessary components aligned for automated removal of old users and some profile properties refuse to update. In this session we will examine the underlying processes controlling user accounts, permissions, profiles and MySites and how they interact. We’ll look at what works, what doesn’t work, and how to work around it. Along the way we’ll recommend Best Practices for managing users, their profiles, and MySites in a SharePoint environment.

Disabling the Silverlight Prompt in SharePoint 2010

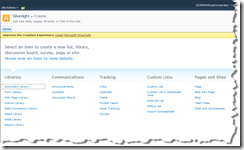
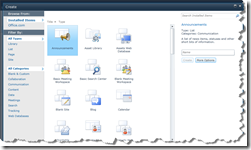
Don’t take the title of this post the wrong way.  I think Silverlight is a wonderful addition to SharePoint 2010 Foundation and Server.  After all, who would suggest that they really prefer the traditional user interface in screenshot 1 below, where the top half of the screen is taken up by instructions and a prompt to load Silverlight, over the Silverlight dialog interface in screenshot 2.  Unfortunately, silverlight requires that a plugin be installed on each user’s workstation and in some environments that is either problematic or forbidden by corporate policy.  This post will explore one option for solving that problem.

NoSilverlight

Screenshot1: No Silverlight

Silverlight

Screenshot2: Silverlight

I’ve been working recently on building an external facing SharePoint site for a client.  When we made the site available for internal users to test it we got reports back complaining about being prompted to install the Silverlight plugin.  Some of our testers either didn’t want to install Silverlight, or were on locked down workstations where they couldn’t install Silverlight.  Unfortunately, if they didn’t install Silverlight they kept getting the nag prompt to install it every time they did something that required Silverlight.  The client wanted a way to permanently remove the nag prompt so none of the external users were ever asked to install Silverlight.  If they already had Silverlight installed that was fine, but this web site should never prompt them to do the install.

In looking for a way to disable the prompt I found that the SPWebApplication object in SharePoint contains a property called AllowSilverlightPrompt.  When this property is set to false users will not be prompted to load Silverlight if it isn’t already installed.  This setting isn’t surfaced anywhere in Central Administration that I was able to discover.  I also found that trying to set it from a Web Part or _layouts application page required raising the privileges of the impersonated user changing the setting.  So in the end I decided to write some short PowerShell scripts that would handle changing the setting.  I wrote both a script to display the current setting and one to change the setting.  Let’s look at the simple Get-SilverlightSetting.ps1 script first.

   1: $webapp= $args[0]

   2: if ($webapp){$wa =  [microsoft.sharepoint.administration.spwebapplication]::lookup("$webapp")

   3: if($wa){

   4:     $switch = $wa.allowsilverlightprompt

   5:     if ($switch){

   6:         write-host "`nSilverlight Prompt " -nonewline;

   7:         write-host "Enabled" -foregroundcolor red -nonewline;

   8:         write-host " on $wa `n";}

   9:     else{

  10:         write-host "`nSilverlight Prompt " -nonewline;

  11:         write-host "Disabled" -foregroundcolor red -nonewline;

  12:         write-host " on $wa `n";}

  13: }else{

  14:     write-host "`nInvalid URL"; 

  15:     write-host "usage: get-silverlightsetting WebApplicationURL `n"}

  16: }else{

  17:     write-host "`nusage: get-silverlightsetting WebApplicationURL `n"}

This script checks in line 2 to see if you have passed a URL for a web application as a commandline parameter and prints out usage information in line 17 if you didn’t.  Line 2 then uses the URL to find a specific SPWebApplication object.  If it can’t find one then it prints out an error message and usage information in lines 14-15.  If the web application is found it uses lines 6-8 to print that its enavled if the allowSilverlightPrompt is True.  Otherwise it uses lines 10-12 to print that its disabled.  This script just displays the current setting and makes no changes.   (Note: the `n used in the write-host lines is an escaped newline character used in the script to format the output.)

Now let’s look at the Set-SilverlightSetting.ps1 script used to turn the silverlight prompt on or off.

   1: $webapp= $args[0]

   2: $switch = $args[1]

   3: if ($webapp){

   4:     $wa =  [microsoft.sharepoint.administration.spwebapplication]::lookup("$webapp");

   5:     if($wa){

   6:         if ($switch -eq $true){

   7:             $wa.allowsilverlightprompt = $switch;$wa.update()}

   8:         elseif ($switch -eq $false){

   9:             $wa.allowsilverlightprompt = $switch;$wa.update()}

  10:         else{

  11:             write-host "`nMissing Switch";

  12:             write-host "usage: set-silverlightsetting WebApplicationURL `$True|`$False`n"}

  13:     }else{

  14:         write-host "`nInvalid URL"; 

  15:         write-host "usage: set-silverlightsetting WebApplicationURL `$True|`$False`n"}

  16: }else{

  17:     write-host "`nusage: set-silverlightsetting WebApplicationURL `$True|`$False `n"}

This script is similar to the last one, but in line 2 it collects an extra commandline parameter representing whether the prompt should be turned on or off.  If it finds the web application it uses the parameter supplied to turn the prompt on in line 7 or off in line 9.  If the prompt is invalid an error message is printed using lines 11-12.   To use the scripts simply open the SharePoint 2010 Managment Shell (be sure to remember to use run as Administrator when opening the shell) and run the following command line from wherever you have the scripts.

.\Set-SilverlightSetting http://siteaddress $False

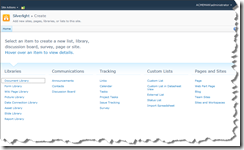
That will turn off the Silverlight prompt for all the sites on that Web Application.  Once you’ve done that screenshot #1 from above will look like this:

AfterSilverlight

I know it’s not a huge change, but it does remove the annoying yellow bar that makes it look like there is something wrong with your site if you don’t have Silverlight installed.  I hope that helps for all of you who work with SharePoint where Silverlight can’t be installed. 

For the rest of us….

I suggest you just install Silverlight and enjoy the newer interface.

Installing SharePoint 2010 RTM on Windows 7 x64

I’ve seen several messages on support forums lately about people having problems trying to install SharePoint 2010 RTM on top of Windows 7 x64 to create a development environment.  The problems seem to stem from changes that have been made to the custom installation sequence required since documentation was written for the BETA.  The Win7 Beta install instructions don’t work quite right for the RTM version.  Microsoft updated the instructions on Technet today (April 30th), but I think they can still be somewhat intimidating since the cover Win7, Vista, and VM installations.  So I thought I would boil them down to just a simple Win7 install and include pictures.  Here are the instructions I’ve tested.  Hope they help you.

Before you Install SharePoint

1. Install Windows 7 x64. Please Note: You can’t use either the K or KN edition (Korean)

2. Install the WCF Hotfix for Microsoft Windows (KB976462). The hotfix is available here: http://go.microsoft.com/fwlink/?LinkID=166231

3. Install the ADO.NET Data Services Update for .NET Framework 3.5 SP1 to enable REST (KB976127). It’s available here: http://www.microsoft.com/downloads/details.aspx?familyid=79d7f6f8-d6e9-4b8c-8640-17f89452148e&displaylang=en

4. Xcopy the SharePoint installation files from the DVD to a folder on your harddrive. If you downloaded them as an executable extract the files using the following command for SPF:

{path to EXE}\SharePoint.exe /extract:{subdirectory}

{path to EXE}\SharePoint.exe /extract:{subdirectory}

or this for SPS:

{path to EXE}\OfficeServer.exe /extract:{subdirectory}

5. Edit the installation configuration file called config.xml located in the \files\Setup\ folder under the subdirectory where you copied or extracted the setup files. Add the following line to the <Configuration> section:


<Setting Id="AllowWindowsClientInstall" Value="True" />

Note: These settings are Case Sensitive. Be very careful with your edits.

6. Install the following included prerequisite:

Microsoft FilterPack Beta – Found in the PrerequisiteInstallerFiles\FilterPack directory where you copied or extracted your files. Run FilterPack.msi

7. Download and install the following prerequisites:

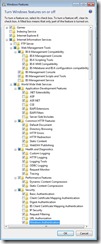
8. Go to Control Panel > Programs and Features > Turn Windows features on or off and enable the following Windows 7 Features:

Win7Features

9. Restart Windows 7 to activate the new feature set.

Install SharePoint Foundation or SharePoint Server

10. To install SharePoint Server 2010 or SharePoint Foundation 2010, run Setup.exe from the folder where you extracted the files.

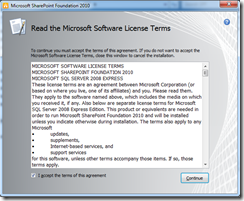
11. Accept the Microsoft Software License Terms.

1SPF license

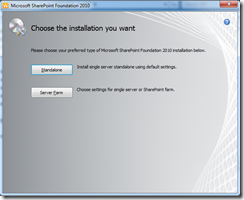
12. Choose an installation type. Standalone is the easiest and sufficient for many Developers. You will need a SQL server available if you choose to do a Server Farm install.

2InstallType

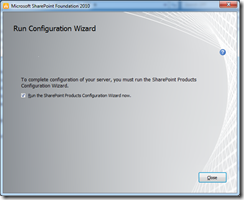
13. Once the installation is complete, you are prompted to run the SharePoint Products and Technologies Configuration Wizard. Click the Close button to complete the installation and configure SharePoint.

4SPSwizard

14. After a minute or two the SharePoint Products and Technologies Configuration Wizard will start. Click Next.

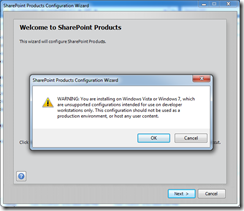
15. You will see a dialog box warning you that Windows 7 is not supported for production environments. Click OK

5Win7Unsupported

16. Next you will see a dialog box warning you that some Services will be stopped. Click Yes.

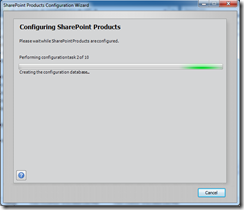
17. You will see a dialog box with a progress bar. Wait for the installation to be complete.

6Progressbar

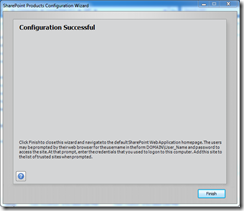
18. You should see a Configuration Successful dialog when the install is completed. Click Finish and SharePoint will launch the Central Admin website. You can now create additional SharePoint sites as needed and install your development tools.

7success

You can now create additional SharePoint sites as needed and install your development tools.

You can see the full instructions on Technet here:

http://msdn.microsoft.com/en-us/library/ee554869(office.14).aspx

Editing a SharePoint Master Page in Visual Studio 2010

I’ll be the first to agree that the best tool for editing a SharePoint master page is SharePoint Designer (SPD).  SPD is able to display both a code and “WYSIWYG” view of the master even if objects on the page are referenced using virtual directories, relative addresses, or addresses that contain dynamic placeholders.  Because Visual Studio can’t open a SharePoint site in place it is unable to provide the same level of editing support. But the problem is that a master page edited in SPD is “customized” and can only be used for that one site (or a single site collection if publishing features have been enabled.) So it has become a best practice to create a custom master in a separate SPD development environment, export it to the file system, and then deploy it in production as an “uncustomized” master page using a feature in a solution. (I documented how to deploy an SPD 2007 master page as a feature in a previous blog here.)

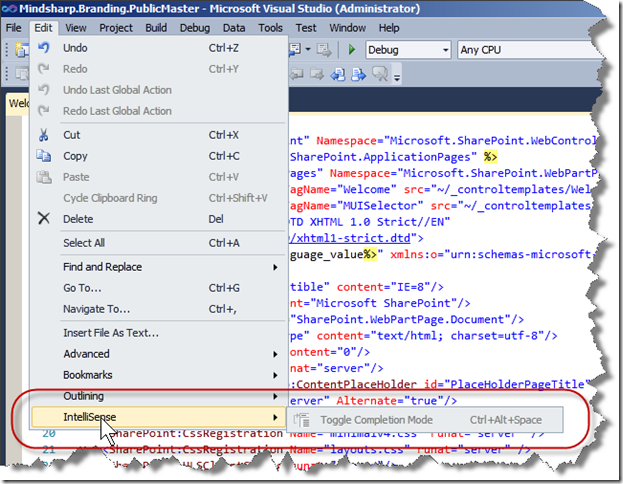
Editing master pages in SPD 2010 continues to be the best practice, but it can be cumbersome for small changes to Enterprise master pages already deployed via a Feature. Sometimes its just not practical to upload the master to a Development site master page gallery, edit it in SPD 2010, and then download the edited copy to be packaged in Visual Studio 2010 and re-deployed to an Enterprise. In those cases it would be nice to make a quick edit in VS 2010. But VS 2010 is unable to interpret the master page in the context of a live site and defaults to the standard code view editor when opening a master page.  This leads to two specific limitations that make even simple edits more difficult.  As you can see from the screen shots below there is no support for expansion/contraction of code sections and Intellisense support is greyed out.

NoExpansion

NoIntellisense

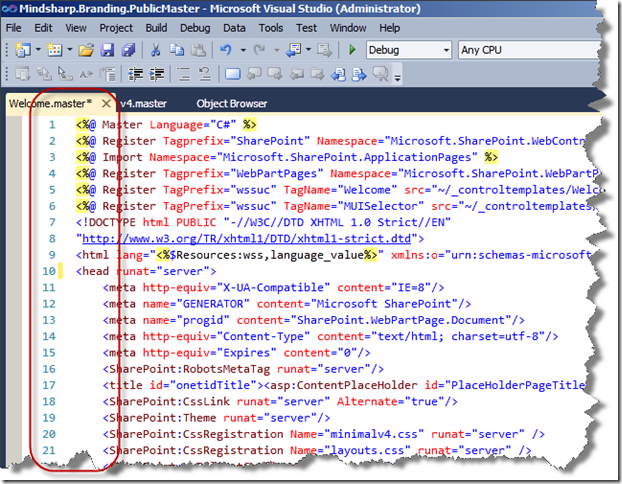
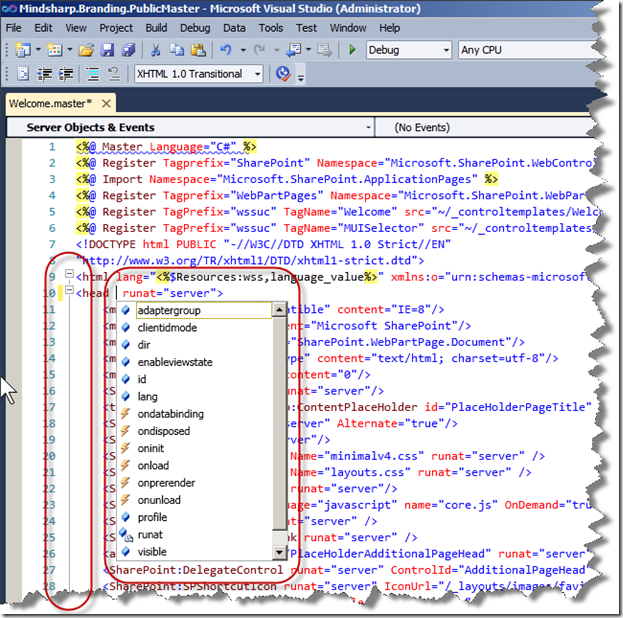
This makes it even more difficult to edit master pages in a code only view. To avoid these limitations you will need to tell VS 2010 which editor to use when opening the master page.  To do this Right-Click on the Master page to be edited in the Solution Explorer and select Open With… from the context menu.  A dialog will open showing all the different Editors that are available.  Highlight the Master Page Editor (Default) entry and click OK to open the Master page using the Master Page Editor in place of the Source Code (Text) Editor.  (Note: Although the Master Page Editor is set as the default just clicking on the master page in Solution Explorer will actually use the Source Code (Text) Editor.  The screenshot below shows the master page after it has been manually loaded into the Master Page Editor using the Open With… menu.  Notice the presence of both Expansion/Contraction Outlining and Intellisense.

MasterPageEditor

A similar problem exists when opening .aspx pages that are not stored in the _Layouts virtual directory.  You can enable full code editing of these pages by using OpenWith… and choosing Web Form Editor (default).