 One of the most common questions I see on the Power Platform forums is: “I have a data source that contains a list of information that I need to send as an HTML table to the individual mentioned in each item. But its sending more than one email to each person. How do I get it to send just one email for each person with all the records for that person?” In this post I’ll demonstrate a general method to accomplish that goal using Power Automate. For this example we’ll use a simple list from SharePoint, but the same technique should work for any data source that can be sorted. Here’s our list:
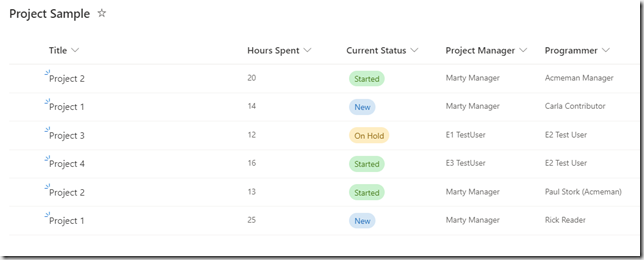
We want to send a table with the hours spent by each programmer and their current status to each Project Manager.
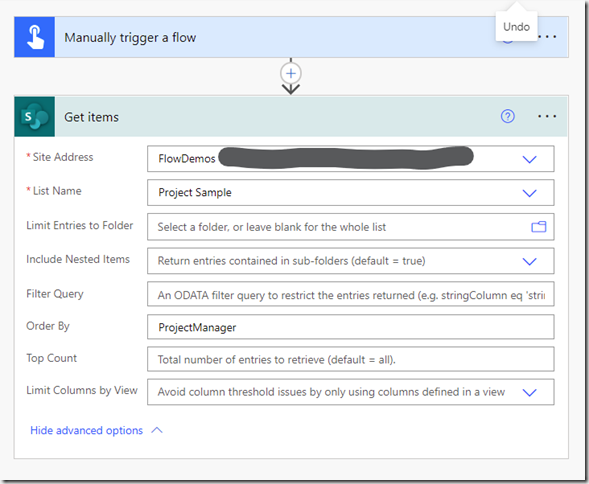
Step#1 – Retrieve the records from data source. Sort them based on the field that references the person, in this case Project Manager. This will not work if the field includes multiple people. Here’s a screenshot of that part of the flow.
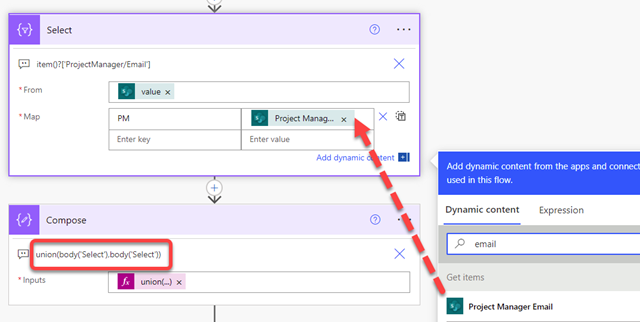
Step#2 – The next step is to get a list of the distinct project managers in the results we have retrieved. Unfortunately, Power Automate doesn’t have a Distinct() function. But we can achieve the same result using a combination of a Data Select action and the Union() function. When we combine the Data Select array with itself using Union() we will get an array that has a single instance of each unique record in the Data Select array. In this case a list of each Project Manager’s Email address.
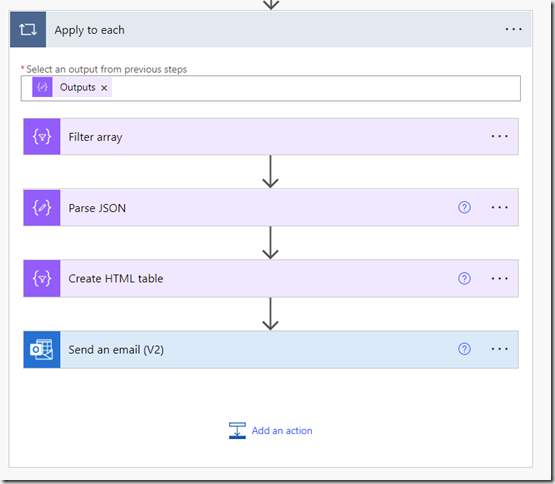
Step#3 – Now that we have an array of distinct Project Manager Emails we can run an Apply to Each loop on each Email, extract the records for that manager, create a table and send the email. Here’s what the overall Loop looks like then we’ll review each step. The loop runs on the array produced by the union in the last Compose action.
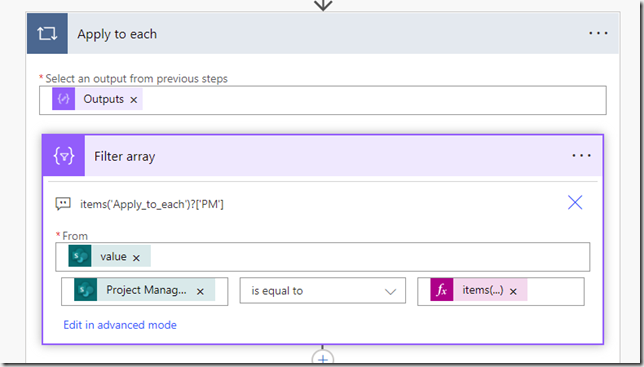
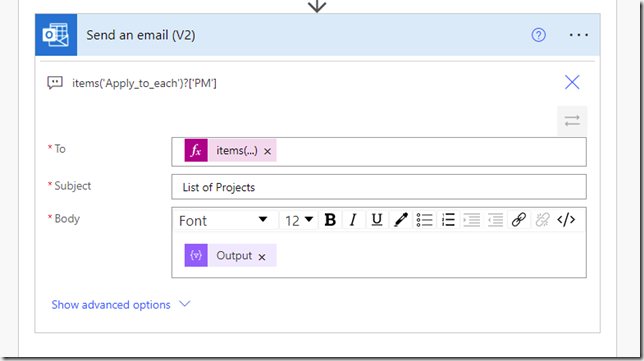
Loop Step #1 – The first thing we do inside the loop is filter the original set of records to create an array of records where the Project Manager’s Email in the record matches the current item’s email. Since we stored the email as a record using the data select we need to retrieve it using JSON notation in the Expressions tab. The JSON will be for the current loop item ‘PM’ property. items(‘Apply_to_each’)?[‘PM’]
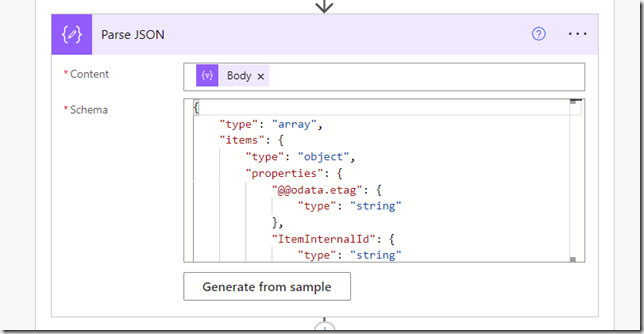
Loop Step#2 – Now that we have the records for one of the Project Managers we need to turn them into a table. First we need to use Parse JSON to re-apply a schema to the filtered records so we can access individual columns. We parse the Body output of the filter array action. Run the flow once after adding the Parse JSON and use the output from the filter array to generate a JSON schema.
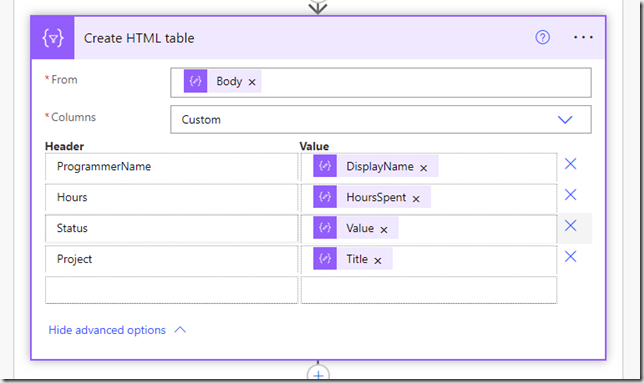
Loop Step#3 – Now we are ready to create the HTML table to embed in the email. Use the Create HTML Table set for custom and map the columns you want in the table from the Parse JSON output. I used the programmer’s displayName, Hours, Status, and Project columns. You may have multiple columns with the same name, like DisplayName. These represent the embedded properties in objects. For example the DisplayName might be for the Project Manager, the Programmer, or the person who created the item in the list. You can tell which one you added by hovering over the column and looking at the JSON.
Loop Step#4 – The last step in the loop is to send the email. Use the same JSON that you used to filter the array in Loop Step#1, since that is the email address of the Project manager. Fill out the subject and Body of the email with whatever information you want, including the HTML table you just created.
That’s all you need. The loop will now process each Person in the list and send one email to each with the correct information. I’m sure your list will be different, but the steps should be essentially the same.
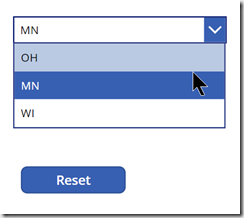 A common question that I’ve run into again lately is how can I set the Selected or Selected Text property of a dropdown control in a Canvas App when there is NO Selected property? The key to solving this problem is understanding the interaction between two other aspects in Power Apps. They are the default property of the Dropdown and the Reset() function in Power Apps. Lets look at how each of these work and how they interact.
 We had to wait a few extra days this year to find out if we were re-awarded or not. Microsoft sent an email on July 1st saying that the announcement had been delayed until July 5th. But I was honored to get the official notice that my MVP status has officially been re-awarded for the 15th year. It just doesn’t seen like its been that long. Every year brings new excitement and new challenges. There is still so much to be learned. I continue to feel honored and grateful for Microsoft’s recognition of my contributions to the community for another year.


